


How to draw a car in just nine easy steps! Cars have always been one of the favorite sports of children. It has also long been the subject of several animated films and TV series, some of the most famous being Cars, Fast Speed, and Hot Wheels. You may also learn many things cartoon drawing, scary drawing, cartoon drawing, cute drawing, flowers drawing, turkey coloring pages for kids cute drawing, puppy drawing, and dog drawing.
What if you could create your dream car? With this step-by-step tutorial on how to draw a car, you can make your dreams come true! Think of it as an opportunity to visualize the parking lot of your home and an imagined car on paper. how to draw a car in 9 stepsThis is sure to be a fun experience for anyone who loves cars. If you have a child who is passionate about cars, then a toy car is an ideal activity that will entertain your kids and help them be creative. Good luck in making your dream car come true!
How to tow a car – get started!
1 step
car drawing – step 1 Draw two small circles on the bottom of the paper. This line will be the inside of your wheel rims. Don’t worry if you can deliver the perfect circle shape! You can always use a pencil or a drawing tool to help you draw the perfect circle quickly and easily.
Step 2 – Go to the car wheel
car drawing – step 2 We drew two circles around the small circles on the upper level. When you have finished drawing the circle, it should look like a pair of wheels, as shown in the illustration. The wheels should also be about an inch.
Step 3 – Attach the Document Bumpers to the Car
car drawing – step 3 It is a long, narrow, rectangular shape connecting both wheels. It will be attached to the car’s base, so make sure you make it as long as you want.
Step 4 – Go to the car body
car drawing – grade 4 Above the bumper, they build the car’s body lines by drawing downward curves that reach the top of the bumper. The figure consists of two downward curved lines: one small curved line for the hood and a larger curved line forming the car’s roof.
Step 5 – Opposite the window door
car drawing – grade 5 On the left side of the roof, a curved line was drawn following the outline of the roof. Next, join both ends of the curved line at 90 degrees to the left.
Step 6 – Next, draw the rear window.
car drawing – grade 6 Repeat the previous step on the other side of the car to create two equal and proportional car windows. The front window is slightly larger than the rear.
Step 7 – Then draw in front of the door.
car drawing – grade 7 Make an antique door by drawing a square shape with curved corners directly below the front window. Mind you, the front window and the front door must be level and level.
Step 8 – Turn on the light and the door.
car drawing – grade 8 Now, it’s time to add details to the car to make it look more realistic. Start by drawing a half circle at each end of the car to create the headlight and tail light. The headlights should be placed directly above the car’s bumper.
Step 9 – Add Patterns to Car Windows
car drawing – step 9 Car windows are typically mirrored, resulting in visible diagonal patterns. Draw several parallel diagonal lines on each car window to create the illusion of “thinking.”
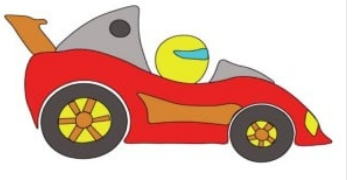
Now that you’re driving the car well, it’s time for the fun part – paint your awesome drag car! Choose colors to make your car bright and colorful! Vehicles come in a wide range of designs and colors. Therefore, if you have a favorite color, chances are the car is in that color.
This gives you many color options to choose from for your car painting. Three more tips to make the car easier! Towing a car is notoriously difficult, but these three tips will make the trip easy and comfortable! Learning to create a drawing of a car cha


